2.3 Calibrate the track and set Home and Verify positions
Calibrate your track, set a repeatable Home position, and save a Verify view for checking the rig after power-up. Use the motion controller’s OLED menu and paired gaming remote: X selects or continues; Square goes back where shown.
Complete 2.2 Install track markers and end stops before starting calibration.
Before calibration
- Track, sensors, and markers are installed and checked as described in 2.2.
- Both sensors detect each end marker through a complete crossing in both directions.
- At both ends, the sensors can cross the entire end marker and travel about 2 inches (50 mm) beyond its outer edge, with the dolly supported and clear of physical stops.
- The full travel path is clear, with enough cable slack to reach both ends.
- The drive is engaged for powered movement. Connected gimbal and lens motors are powered, set up, and calibrated.
For Spectrum Studio, insert the included microSD card and keep it installed; it stores calibration, presets, and loops.
Start calibration
Open Guided → Calibrate Track. Select Calibrate Track (Overwrite).
Saving a new calibration clears existing presets and loops. For an unchanged setup with saved calibration, use Restore Calibration instead.
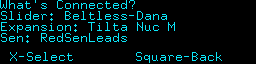
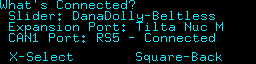
On What’s Connected?, check that the slider and ports match your hardware. If using an RS gimbal with Conductor, confirm Connected. Correct any setup issues, then press X.
Spectrum Studio
Conductor
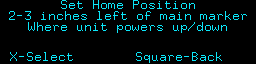
Set Home position
Home is the position on the track used for startup and shutdown. Choose a mid point marker to serve as the reference marker, and set Home 2–3 inches (50–75 mm) to its left. Any of the four mid point markers labeled A–D can serve as the reference marker.
To set Home at a specific spot, install a mid point marker 2–3 inches to the right of that spot, between the end markers, and use it as the reference marker. Follow the marker alignment guide in 2.2 Install track markers and end stops.
Use the remote to position the sensor assembly 2–3 inches (50–75 mm) left of the reference marker.
Set pan, tilt, and any other connected axes to the positions you want for power-up and shutdown. Let all motion stop, then press X to record Home.
Let the track scan finish
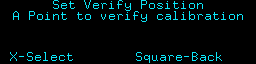
At Calibrate Track?, clear the path and press X. The dolly moves automatically to find the reference marker and record both end stops. Allow about two minutes.
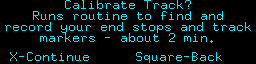
Brief reversals are normal. The sensors must fully cross each end marker and pass back over it before the controller records that limit. Wait for Set Verify Position.
X or Square stops the scan. If clearance or detection is wrong, stop, correct the issue, and restart calibration. A stopped scan is not a completed calibration.
Set Verify
Position and frame the camera at a fixed, easily recognizable reference you can compare after a restart. If using a zoom motor, zoom all the way in to make small framing differences easier to see.
Let all motion stop, then press X to store Verify. The rig returns to Home automatically. Keep the path clear and wait for Save Calibration?; Square stops the return.
Choose the startup behavior and save
At Save Calibration?, use Left / Right to choose how the controller restores calibration on power-up.
| Choice | What happens on power-up |
|---|---|
| MANUAL / Manual Verify | Waits for you to position the dolly near Home and confirm before searching for the reference marker. |
| AUTO / Auto Verify | Starts restoration automatically after a completed shutdown at Home. Otherwise, it falls back to Manual for that startup. |
| Off — Spectrum Studio only | Disables automatic startup restoration. You can start Guided → Restore Calibration when needed. |
Spectrum Studio
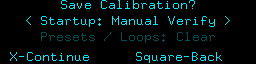
Conductor
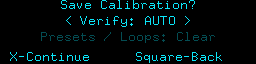
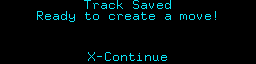
Press X to save the calibration and selected startup setting. Wait for Track Saved — Ready to create a move!, then press X again to continue.
If calibration does not finish
- Too close to a physical stop or cable limit: stop, move the end marker inward, and repeat the clearance check in 2.2.
- Marker not found or inconsistent detection: check Home placement, clean rail, marker alignment, and both sensor LEDs.
- Sensor order mismatch on Spectrum Studio: check the sensor installation and Lin. Sensor direction.
- Calibration Save Failed: resolve the storage issue and repeat calibration. On Spectrum Studio, check the microSD card.
Test calibration restoration and confirm the Verify position before creating presets or loops.