1.1 Prepare your motion controllers and network
Prepare Maestro and your Spectrum Studio or Conductor SA2.6 motion controllers for network communication. Confirm supported firmware, select the Maestro protocol, reserve controller IP addresses on your DHCP server, and record your network settings. When you finish, your system will be ready for controller discovery and assignment in Platform.
Prepare your controllers and network
Have Maestro, your motion controllers, Ethernet cables, access to your network settings, and a phone/computer ready. Use the microSD card supplied with each controller if a firmware update is needed.
- Confirm that each motion controller is running firmware that supports Maestro. If an update is needed, use the firmware package supplied or confirmed by eMotimo for your Maestro installation and follow the update steps below.
- Connect Maestro and all motion controllers to the same network and subnet. Connect the device you will use to open Platform to that network too.
- Power on the controllers. Power Maestro using PoE+ or the included USB-C power adapter.
- Leave Spectrum Studio and Conductor controllers set to DHCP. Once they are connected, reserve their IP addresses in your DHCP server settings using the steps below. This is our recommended network configuration.
- Record the network port configured for each controller. Maestro’s connection to that controller must use the controller’s IP address and matching port. Each device needs its own IP address; different controllers can use the same port number.
Update controller firmware if needed
Use the microSD card supplied with the controller. Complete the update for each controller before configuring its network adapter.
Conductor SA2.6 firmware
Update your Conductor SA2.6 to the latest Maestro-compatible firmware. View the firmware update instructions.
Spectrum Studio firmware
Update your Spectrum Studio to the latest Maestro-compatible firmware. View the firmware update instructions.
Configure each motion controller
Complete the steps for each controller model in your system. Reset the network adapter before entering your intended network settings.
Conductor SA2.6
- Connect Conductor to the network via Ethernet.
- Go to Settings → Settings Page 4/6 → Reset NetAdapt.
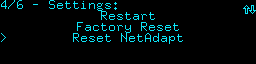
- Go to Settings → Port Settings → Net Adapter Config and change Network Port to Maestro.
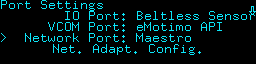
- Select Net. Adapt. Config. and leave IP Type set to DHCP for the recommended configuration. The DHCP server will assign the controller’s IP address.
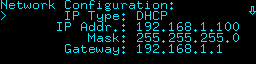
- Scroll to the bottom of Network Configuration and select Auto-Configure.
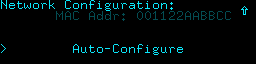
- After auto-configuration is complete, reopen Net. Adapt. Config. to view the Conductor’s newly assigned IP address.
- Record the controller’s IP address, network port, and firmware version in the network worksheet.
Spectrum Studio
- Connect Spectrum Studio to the network via Ethernet.
- Go to Settings → Settings Page 6/7 → Reset NetAdapt.
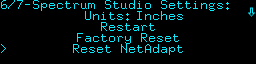
- Go to Settings → Settings Page 3/7 → Net Adapter Config and leave IP Type set to DHCP for the recommended configuration. The DHCP server will assign the controller’s network settings.
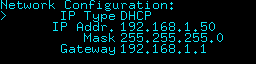
- Scroll to page 4 and change Net Protocol to Maestro.
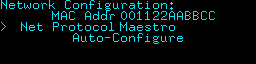
- Select Auto-Configure.
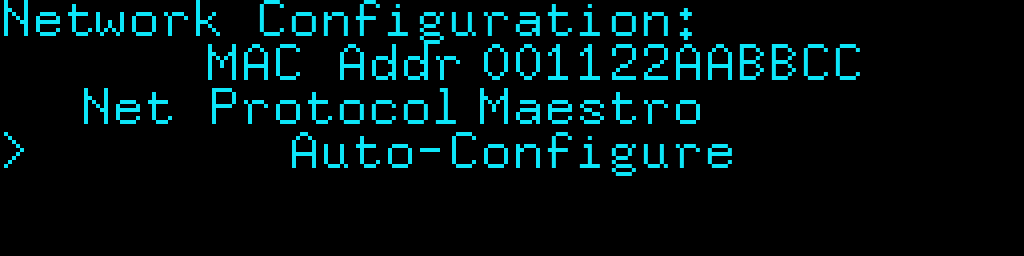
Keep Net Protocol set to Maestro when you select Auto-Configure. The example above shows a different protocol.
- After auto-configuration is complete, reopen Net. Adapt. Config. to view the Spectrum’s newly assigned IP address.
- Record the controller’s IP address, network port, and firmware version in the network worksheet.
Reserve controller IP addresses on your DHCP server
We recommend leaving Spectrum Studio and Conductor controllers set to DHCP, then reserving an IP address for each controller on your DHCP server. The controller continues to obtain its network settings automatically, while the reservation keeps its address consistent between power cycles.
Without a reservation, DHCP may assign a different address when a controller reconnects. A manually configured static address can also cause a conflict if the DHCP server is allowed to assign that same address to another device while the controller is powered off. A DHCP reservation lets the server manage the assignment and hold the address for that controller.
- With the controllers connected and configured for DHCP, open your DHCP server settings. On many networks, these settings are in the router’s administration interface.
- Find each controller in the connected devices or DHCP lease list. Match its MAC address to the controller so you reserve the correct device.
- Create an IP address reservation for each controller using its MAC address. Reserving its currently assigned address keeps the setup consistent. Save or apply the reservations.
- Record the reserved addresses in the network worksheet. After a power cycle, confirm that each controller receives its reserved address.
If you or your network administrator have a different address plan, use the configuration that suits your network. Keep Maestro and the controllers on the same subnet, use a unique address for each device, and protect manually assigned static addresses from DHCP allocation or other conflicting assignments.
Before moving on, confirm:
- Every Spectrum Studio or Conductor SA2.6 is running Maestro-compatible firmware.
- Maestro and all controllers are on the same network and subnet.
- Controller IP addresses are reserved on the DHCP server, or your network administrator has configured stable addresses and protected them from conflicts.
- Controller IP addresses and ports are recorded for assignment in Platform.
For the final connection checks, see 1.3 Confirm your motion controller connections.