2.4 Test calibration restoration and Verify on the controller
After completing 2.3 Calibrate the track and set Home and Verify positions, test a restart before creating your first move. Keep the track, markers, camera, and motor setup unchanged, and leave the full travel path clear.
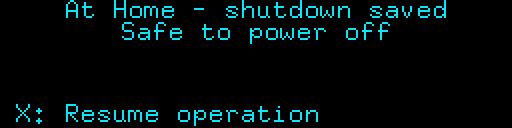
- Open Guided → Shutdown and press X to move the rig to Home. Wait for At Home - shutdown saved and Safe to power off, then unplug power/remove the battery from the motion controller.
- Leave the rig at Home. Power the system back on. If a gimbal or lens motors are connected, make sure they are powered. On Spectrum Studio, keep the microSD card installed.
- Follow your saved startup setting:
- AUTO: Restoration starts automatically if shutdown at Home was completed. Otherwise, this startup uses MANUAL.
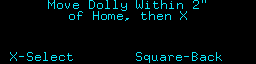
- MANUAL: The motion controller starts at the Move Dolly Within 2" of Home screen. Use the remote or the directional control on your Spectrum or Conductor to move the dolly within 2 inches (50 mm) of the saved Home position. Wait for motion to stop, then press X on the remote or press the directional control inward.
- Off (Spectrum Studio only): Restoration does not start at power-up. Open Guided → Restore Calibration. On STUDIO_26_01_B1, the screen shows Position rig at Home and Select: seek reference. Position the rig at the saved Home location and wait for all motion to stop. Clear the full travel path, then press X on the remote or press the directional control inward. The rig will search for the reference marker and move automatically to Verify. Continue with steps 4–5 below. X or Square stops automatic movement; if stopped, restart restoration and confirm Verify before using saved moves.
- Watch the controller search for the reference marker and show Moving to Verify. Keep the path clear until motion stops.

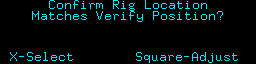
- At Confirm Rig Location, compare the camera image with the fixed reference you framed when saving Verify. Check the rig position and framing, including zoom if used. Press X only when they match.
Correct the Verify position
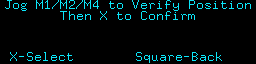
If the view needs correction, press Square to enter the correction screen. Follow the controller’s prompt: Spectrum Studio allows adjustment of Pan, Tilt, and M4; Conductor allows adjustment of M2. Jog the allowed axes to match the saved Verify view, let motion stop, then press X to confirm. This confirms the restored reference; it does not set a new Verify shot.
Spectrum Studio — adjust M1/M2/M4
Conductor — adjust M2
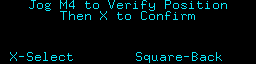
Keep the dolly reference unchanged during Verify adjustment. If a lens motor needs recalibration, return the rig to Home, calibrate the lens motor, and power cycle before trying restoration again.
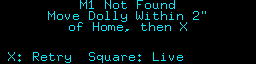
If the reference marker is not found, the controller shows M1 Not Found. In this message, M1 means the reference marker. Return the dolly to within 2 inches (50 mm) of Home and press X on the remote or press the directional control inward to retry. A stopped or failed restoration leaves presets and loops unavailable; complete restoration and confirm Verify before using saved moves.
Before moving on, confirm that calibration restores successfully and the rig matches the saved Verify position.